Using VSCode
Microsoft’s Visual Studio Code is an amazing general-purpose code editor. Most people I collaborate with use it as their primary editor, and that will be true in most professional settings you enter. This is the first year we’re using it in the class, and I have some high hopes for it.
As with any powerful tool, it can take a little while to get comfortable with VSCode. The documentation is excellent, but may sometimes assume more advanced programming skills than you have. The videos are also excellent and recommended.
I will mostly let you explore on your own, but here are a few important starting points.
Editor Basics
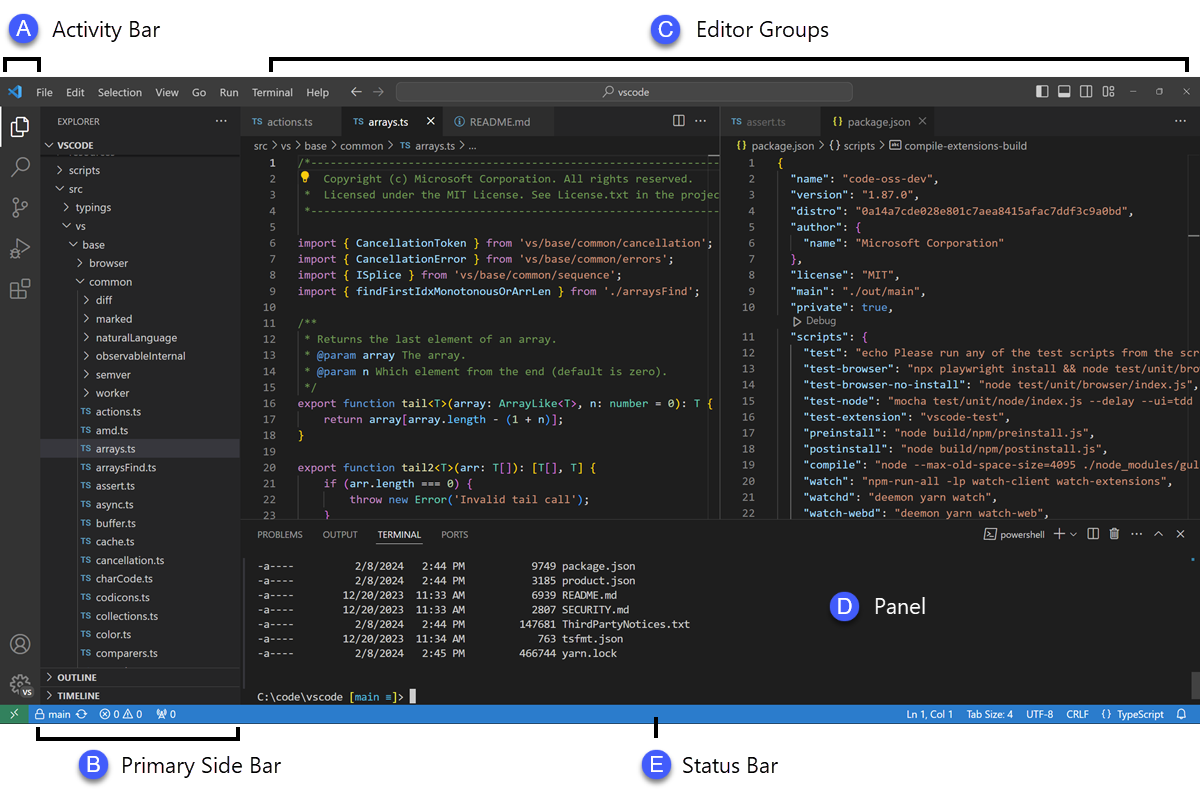
The editor has 4 main parts. Since each part can itself have lots of parts, this is not as simple as it sounds! From left to right, here are the main areas:
- the activity bar provides you with various tools and ways to switch views
- the side bar content changes depending on what you’ve selected in the activity bar. By default, it shows a file tree listing, like you would find in windows explorer or the Apple Finder. But it can also provide a list of extensions, information about your git status, or information about project tests, among other things.
- the editor groups are clusters of tabs. Usually a tab will contain a file, but things like the VSCode preferences and live HTML previews also show up in this area
- the panels near the bottom include the built-in terminal, a list of errors VSCode has found in your files, and other important tools
Also, the blue status bar on the bottom has clickable areas that let you interact with other editor features.
Finally, it’s important to mention the Command Palette. This is a magic bar that opens up in the top center of the screen when you type F1 or Control-Shift-P (Command-Shift-P on a Mac). This gives you rapid access to many, many commands, and we’ll use it a lot.
Read more about the user interface here.
Extensions
There are many, many amazing extensions to VSCode. I’ve chosen a small number of them and bundled them into an extension pack. Install it by clicking on the extensions button in the activity bar and typing searching for History Hack Pack. Follow the links in the documentation to learn more about the individual extensions.